When we bought the bus in March, 2013 we had to remove all of the paraphernalia that made it look like a school bus which is kind of a funny idea considering everything about it looks like a school bus. This included the stop sign, the bar the swings out from the front and the lettering on the front, back and sides. We roughly sanded off the words and put a spray of metal primer on top to prevent rusting and this is how our Petunia looked for about a year.

When we found out we were going to show the bus at the Tiny House Conference in April 2014, we had some major work to finish up on the inside and simply didn't have the funds or the time to paint the entire outside. To make do, we painted a blue stripe down the side and the forehead black to cover up the rough spots.
 |
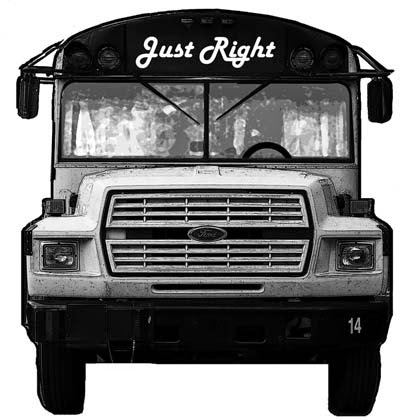
| The Tiny House Conference Photo by Christopher Tack |
 |
| The Tiny House Conference Photo by Christopher Tack |
This fall we finally had the time and funds to take the plunge into painting. We gave ourselves 5 full days around Thanksgiving to get to the task, but as with most things, it ended up taking about 3 weeks.
We started by washing the bus, a large task that took essentially an entire day of scrubbing. We did not sand the bus before painting, many do, but we were simply too lazy and didn't want to take the time. Plus, I didn't sand before applying the blue stripe last year and it's still holding up like new.

 |
| The years of grime that built up on the roof |

Then, we threw down a new layer of caulk on the roof seams. We're lucky to never have experienced a roof leak and want to keep it that way. We were sure to use paintable silicone caulk so that our paint would cover it up easily.
 |
| The caulked seams and our first coat of roof paint |
 |
| Washing the back of the bus |
After we washed the bus, we took the time to remove all of the lights, reflectors, mirrors, the front grill, the water heater (we were without hot water for 3 days, ugh) and any other attachments that could come off. They all got a scrub and the metal parts were sanded and spray painted before reattached. We were careful to cover any holes left to ensure no water got in if it were to rain (which it did, a lot).

Then the taping began, and if I never see blue painters tape again it will be too soon. We went through 5 rolls of the stuff and I reused as much as I could throughout the process. To this day I'm finding little wads of tape stuck to the bottom of my shoes and the dog's feet.
Tip: Don't skimp on painters tape. It rained a lot during our progress and the off-brand stuff peeled right off and had to be reapplied but the "good stuff" held on and worked great.

After almost 2 days of prep, we started painting the roof. We choose to use Hy-tech Bus-Kote paint on the roof. According to the hy-tech website, Bus-Kote is a "bight white, acrylic elastomeric, insulating ceramic, waterproof coating designed specifically for Buses and recreational vehicles. This high build rubber like coating waterproofs, insulates, soundproofs, beautifies and protects with a ceramic shield that expands and contracts with varying hot and cold temperatures plus resists thermal shock. Bus-Kote offers superior mildew resistance and ultraviolet ray reflectivity."
Now, there's some confusion about hy-tech products. Hy-tech insulating beads are tiny ceramic beads that you can mix into most paints for their insulating properties. Bus-Kote is a premixed acrylic elastomeric paint that contains the hy-tech beads. It is not just white metal paint with beads in it.
We splurged the $40 per gallon and are glad that we did. It's thick, like warm cream cheese, and goes on nicely with no drips. It does take several coats though, we ended up doing 3 coats on the roof and 4 around the windows to cover any streaks. The paint is matt and rough so it doesn't really look like shiny car or RV paint but it still looks nice when we were all done. Plus, the thickness that it dried on my fingers after painting around the windows really helped me envision how it helps with insulation.
 |
| My awesome dad came over to help paint. Thanks dad! |
 |
| We removed some of the reflective strips from the back of the bus but just painted over others. |
 |
| Christmas Ads covering up the windows that we blacked out First coat of basket on the roof- see the streaks? |


The hy-tech paint takes at least 4 hours to dry and can't be applied less than 4 hours before sunset so we were only really able to get 1 coat on the first day and 2 the second day. The morning of the second day we backed the bus up into full sun to help dry out the condensation that formed on the roof over night. The bus-kote directions were very clear that surfaces should be dry before applying. While our coats of roof paint dried we started painting the sides with harbor blue ace-oleum, ace-hardware brand rustoleum metal paint.


Metal paint is oil-based and very different than the bus-kote. It's drippy and sticky. I perfected a technique of using a peanut roller to put on a very thin coat in a 3-4 foot section and then went over the entire section two more times with an empty roller to catch any drips. Every single screw and rivet had a drip after the initial pass but very few got by using this triple check method.
Tip! Between coats of oil-based paint, wrap your brush and roller in a grocery back and stick them in the freezer. Pop them out a few minutes before your next coat and you avoid having to wash the roller/brush out until the very end. This method works for months but it doesn't work with water based paint, they will just freeze.


Because the metal paint is so thin, it only took 1 gallon of paint to do 2-3 coats on the entire bus. A peanut roller with medium nape provided the best application to make even layers but I did use a brush in places where the roller simply couldn't reach.
 |
| Final coat on the bus' forehead |

After finishing up painting the roof with bus-kote, we applied a single coat of the hy-tech flexiclear. I highly recommend using this clear coat on top of the bus-kote. There was about a week that went by between the two due to school and work. A few spots on the roof got dirty and it took some serious scrubbing to clean them before the clear coat went on. Once the clear coat was on though, the roof and around the windows were much easier to just wipe clean. It also gives the paint a nice shine.
 |
| A scrub and spray paint for the eyelashes |


Painting the black bumpers along the side was my least favorite part of the bus. They required the most taping and I had to use a brush for the whole process. Metal paint is not fun to apply with a brush as it's easy to streak and run. It took 4 coats to paint the bumpers.
 |
| Add caption |

After about three weeks of work, our bus was finally painted! At the end of this post is a tally of everything we bought to complete the job. It ended up costing us about $315 versus $2700 to have it done professionally. That's a savings of about $2400. Frankly, the paint job could have come out much worse and I would still be satisfied. Overall though, we're incredibly pleased with how it looks.
It's still shocking when we come home and our dirty old yellow bus is gone, replaced instead by this beautiful blue and white Petunia.


Things we already had:
Paint Brushes
Some paint rollers
Black Rustoleum paint
3 rolls of painters tape
2 flimsy paint trays
Things we had to buy:
Bus Kote Roof Paint: $146.94- 3 gallons, used all 3
Flexiclear Paint: $56.83 - 1 gallon, used about half
Harbor Blue Metal Paint-$29.99-1 gallon, used entire gallon
Gloss White Metal Paint- $11.52- 1 pint, used about 2/3 pint
Rollers- $12
Painters Tape - $12 - 2 rolls of 1"
Mineral Spirits - $15 - 1 gallon
Nicer Paint Tray - $8
Paintable Silicone: $21 - 3 tubes
Total Cost:$313.28
It looks wonderful! That's some real sweat equity!
ReplyDeleteLooking good! Really completes the bus!
ReplyDeleteWhat a great paint job - and so affordable. Now it looks like your own rather than a school bus.
ReplyDelete